Eugene
Struthers
How to correct the digital noise in your images
By Eugene Struthers

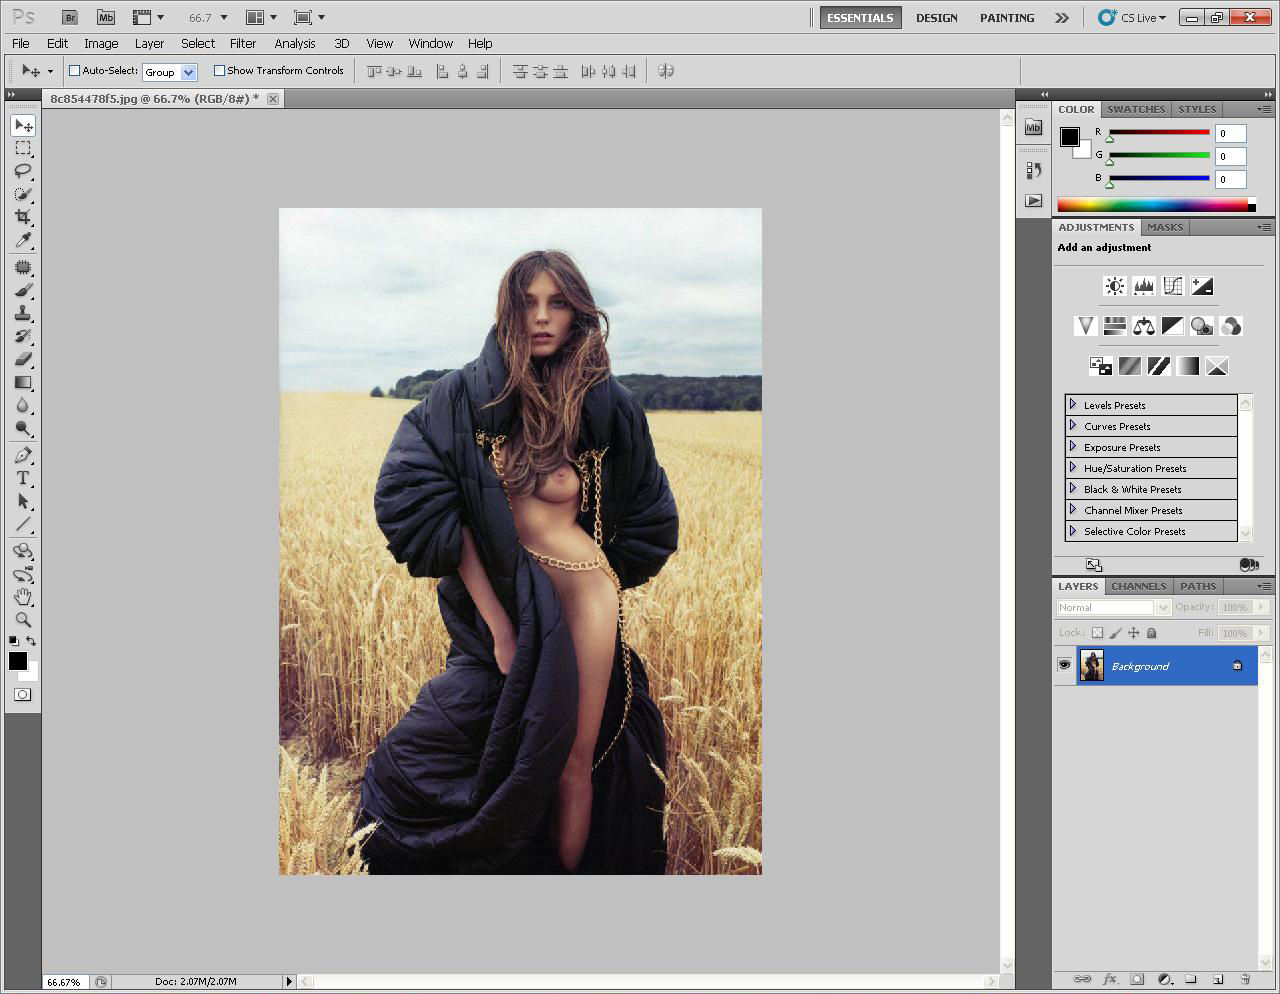
Original image
In this tutorial, I am going to show you how to reduce the amount of noise in your images. I will try to demonstrate this up until the point, aspects of digital noise actually get eliminated.

What is digital noise?
In digital photography, the term "noise" is commonly used term to describe visual distortion. Similiar in comparison to when you turn the radio on and you get static or that crackling sound over the air waves. Some times when you haven't tuned in your radio to the correct frequency, you will hear a hissing sound. It is the digital equivalent of film grain for analogue cameras. A full article of what digital noise is and how to reduce it, exists in my blog on the top right hand side of this website.
As you can see from the image above. There is a lot of digital noise around the models hair and face. Border line blurring the beauty of her in total. When we reduce noise, the thing to remember is, it is a balancing act. As we reduce noise, we are actually taking away same digital information as well. So we need to remove the most amount of noise whilst also maintaining the most amount of detail.

As with all editing, it is better to zoom in to appreciate what we are doing. So for this tutorial on noise reduction. I have zoomed the image into 200%. In the image above we can see up close, the visual distortion. Evidence of this can be seen in the pixel blotches in and around the model's hair, face, jacket and skin. There is a lot of colour noise as well as luminance noise.
In this editing technique, I used Photoshop CS5. To begin scroll across the top menu bar and select the command option "Filter", once this sub menu opens up. Scroll down the list, select the title "Noise" and then scroll once again across to your right hand side and select the sub title "Reduce noise".

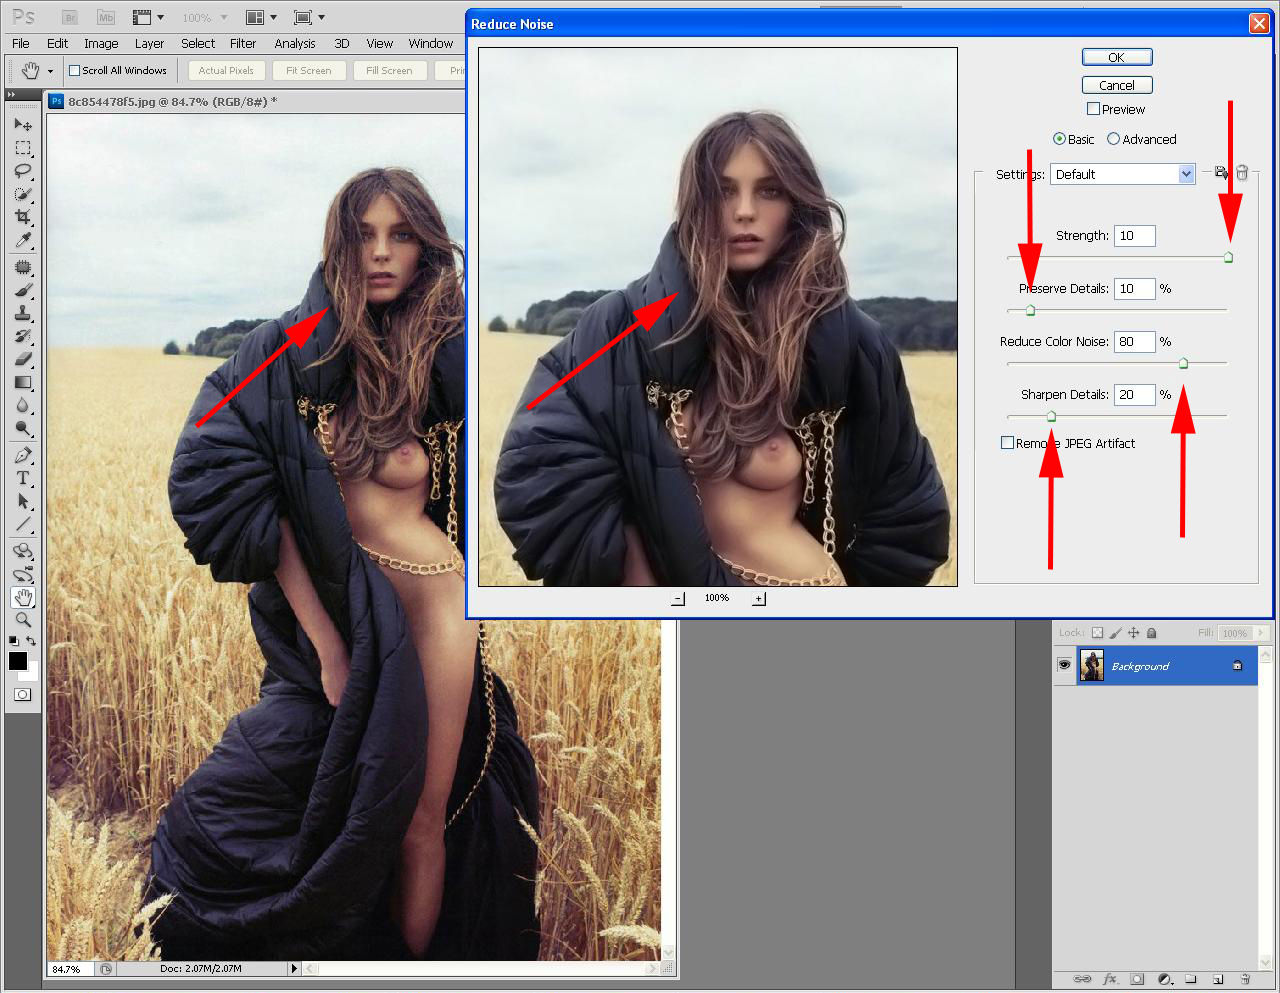
A reduce noise editing window will open, with the default Photoshop editing data. Unclick the preview and the remove JPEG artifact tick box.

If you want to know what JPEG artifact is? I have covered this in an article I have done on "What is digital noise". For more information on this. Please visit my blog section on this website.
In the noise reduce window. Set the "Strength" slider to the maximum "10". Next move the slider for the "Preseve details" to "0%". This will apply the most amount of noise cancellation in the luminance area's within your image. Then for "Reduce Colour noise" do the opposte and reduce this to "100%". In the final step reduce the "Sharpen details" to "0%".

As you can see from the image above, we have managed to soften and reduce the noise quantity and quality, however in doing so. We have lost a bit of detail within our image. To bring back the detail and restore the full digital quality within our image. We need to increase the "Preserve details" slider slightly to pull back digital detail into our image. For this tutorial I have set the Preserve details to "10%". Your image will obviously require a different setting. Just remember if we add to much detail, we will also be adding a lot more noise. Click on the preview button to see the before and after effect.
Next we need to reduce the colour noise, to the point that it isn't making the image dull and lacking in colour. But just enough to eliminate the blotchiness and the yellowish luminance. Again this will be different for each image. In the image above, I have reduced the "Colour noise" to "80%".
The next step in our procedure is to sharpen the detail within our image. This is kind of a balancing act which you will need to apply a trial and error principal too. Because if you sharpen it to much, it will infact be sharpening the noise as well. This can actually make the image appear worse. As a guide, we want to be using sharpening very sparingly. In the above image I moved the "Sharpen detail" slider to about "20%". Which is the maximum I would use. When using this process to reduce noise.

In the above image. You would only use the "Remove JPEG Artifact" if the image was captured as a jpeg in camera. In low resolution images it works the best, such as images captured with a 5 megapixel camera. In images where the resolution is slightly higher such as 10 megapixles up wards. It can kind of blur aspects of the images quality. And detracts the images quality quite a bit. A trial and error principal would need to be applied. Next click "Ok" to save your image.
Before After


Mobile: (+44) 07733117207
Email: EugeneStruthers@EugeneStruthers.com
England, United Kingdom
Qualified & Accredited
Journalist, Proofreader and editor, Copywriter, Web editor,
SEO, Digital and Social media Marketing


